The SANS Internet Storm Center (ISC) is a fantastic repository of information about past, current, and emerging cybersecurity trends. The ISC provides invaluable information sourced from thousands of intrusion detection sensors around the world and evaluated by a team of volunteer intrusion detection analysts, called handlers. One of the strengths of the system is the vast number of sensors that provide information for analysis. ISC provides a free way for you to contribute to their research by hosting a sensor, called the DShield honeypot.
I have set up a DShield honeypot using an Amazon Web Services EC2 instance. This is a guide to setting one up for yourself if you also want to contribute. One thing to note before doing this is that this instance will need to be a dedicated honeypot. You won’t be able to use it for anything else.
AWS Setup
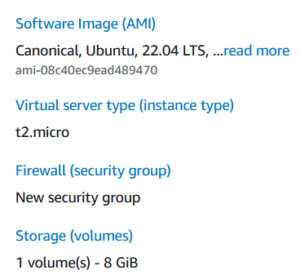
DShield can run on a t2.micro EC2 instance, which qualifies for the AWS free tier. Log in to your AWS account (or create one if you don’t have one) and head to the EC2 dashboard. Launch a new instance using the Ubuntu 20.04 LTS. You can leave most of the settings on the default since DShield is not resource-intensive. At this time, DShield does not work with Ubuntu 22.04 LTS, so if your VM later asks you to upgrade, do not.
Create a new SSH key pair and save it in a safe location on your local machine. For the security settings, initially limit the access to SSH only from your IP address. Launch the new instance and wait for it to fully boot. Once it has, SSH into the VM with your key and update its repositories and packages with sudo apt-get update && sudo apt full-upgrade -y.
DShield Setup
While your VM is updating in the background, navigate to the security group settings for the DShield instance. Since this is a honeypot, you will need to make a number of firewall changes to intentionally expose it to the Internet. This isn’t something you would normally do, but the goal here is to have the honeypot be scanned and/or attacked so it can gather information about those scans/attacks.
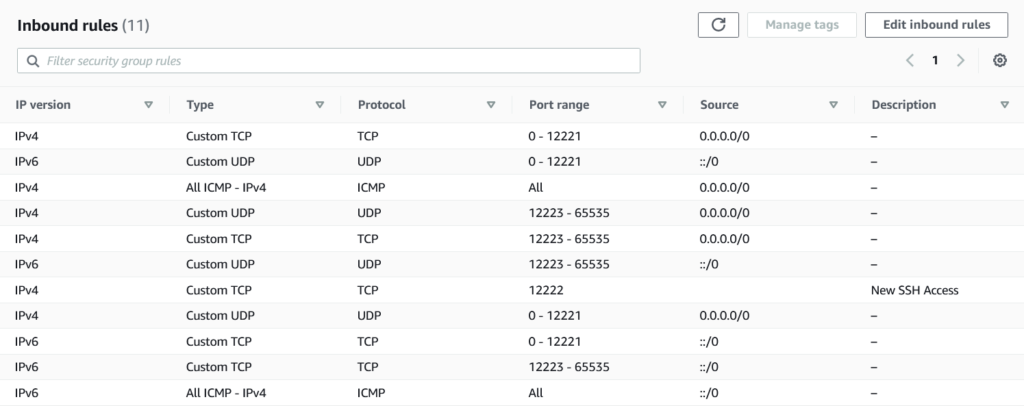
After the DShield honeypot installs, SSH access will be changed to listen for connections on port 12222, instead of 22. Ensure your firewall settings will allow you to access the VM on port 12222. ISC recommends allowing ALL access to the VM from your local IP address. For all other ports (0 – 12221 and 12223 – 65535), allow access from ALL sources, both IPv4 and IPv6, for TCP, UDP, and ICMP. Your configuration should look something like the screenshot below.
By now, your VM should be fully updated and upgraded. Clone the DShield GitHub repository onto the VM, then navigate to the dshield/bin directory. Run the installer script with sudo ./install.sh. The script runs a guided installer and will first make sure everything it needs is installed. While it does this, go to the ISC website and create an account if you don’t already have one. For the honeypot to communicate back to ISC, it will need an API key. After creating your account, check for the verification email, verify your account, and after a short time, your API key will be available in the My Account tab.
At some point, the installer script will ask for your ISC account email address and the API key. Input both and continue with the installation, keeping the default settings. After the install has completed, reboot your instance. While it is rebooting, navigate back to the security group settings and remove the firewall rule for port 22 from your local machine that you created when you first launched the instance.
After rebooting, SSH into your VM on port 12222. Navigate back to the dshield/bin directory and run the ./status.sh script. If everything installed correctly, the status script should show everything is OK.
ISC recommends conducting a port scan of your honeypot VM. AWS allows users to conduct penetration testing on their own EC2 instances. Be sure to double check the AWS policy before doing a scan. Avoid conducting repeated port scans on your instance so you don’t create any inaccurate data.
If you SSH into your honeypot and tail -f the logs located at /var/log/dshield.log, you should see log entries start rolling by. Note that the time is expressed in seconds elapsed since January 1, 1970, known as Unix time.
Your DShield honeypot is now all setup and ready to contribute to the important work that ISC does.